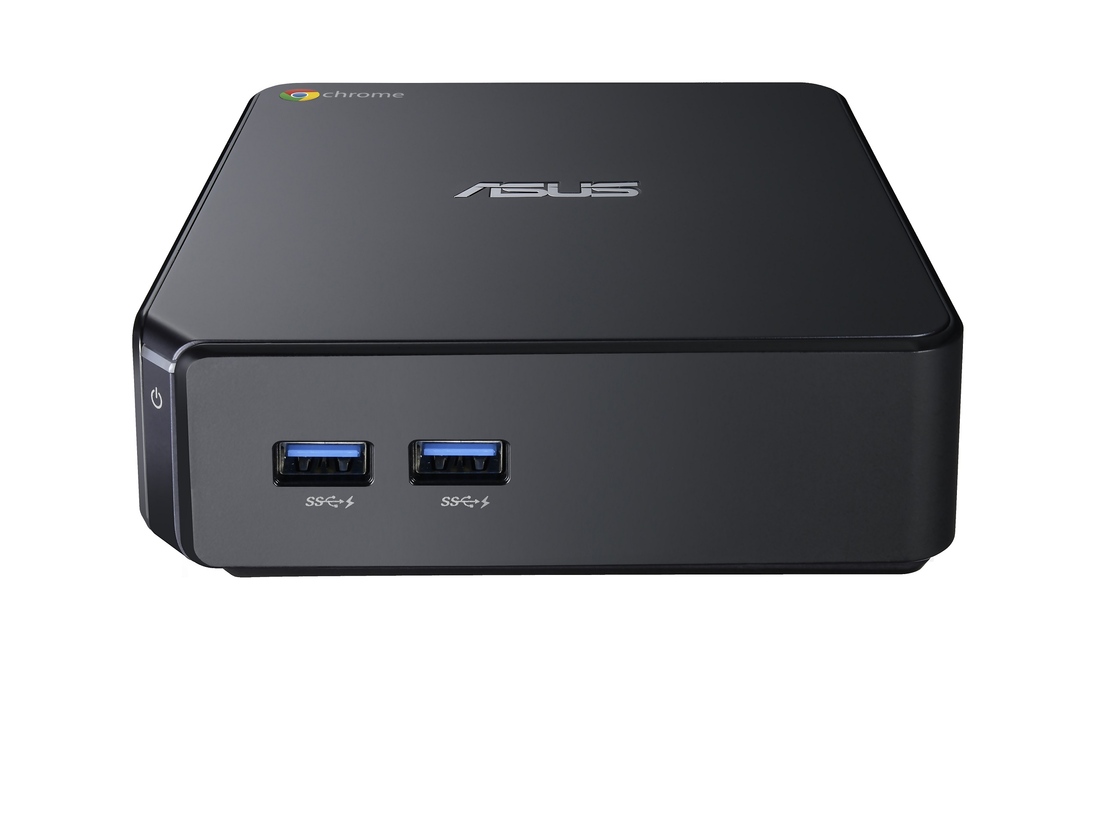
Tech Hobbyist: Convert the $179 Chromebox to a full Linux desktop
- A quick hands-on preview: The Microsoft Surface 3 Pro - June 19, 2014
- Hands-on Review: The Dell Venue 8 Pro - June 9, 2014
- Product Alert: Dell Laptop XPS 13 [Developer’s Edition] - April 7, 2014
*** IMPORTANT NOTE: This is a very fun and “doable” project; one which I was able to successfully accomplish all of the various methods as described in this post. While I’ve tried to provide as much information and helpful hints to guide others, it is my strong suggestion that you read through this entire article as well as to read some of the various links to gain a strong familiarity with the process. As with any similar project, the possibility does exist to BRICK the device. When possible take steps to backup ***
HAPPY 2015 –> UPDATE: January 14th, 2015
Matt has continued to provide updates to both the firmware and installation methods (many thanks to Matt for this work). Please use the following link to learn more: https://plus.google.com/+MattDeVillier/posts/KGX5tGiW4UV
[2nd Update (June 3rd, 2014): A coreboot firmware image has been made available for the Celeron-based Chromebox thanks to Matt DeVillier. By flashing this firmware replacement on the device, a more direct method is established to boot straight to Linux on the Chromebox. It should be understood that this solution is geared towards those wanting to permanently replace the ChromeOS. An advantage to this approach over the other methods listed below (each has their own strengths and benefits), this firmware upgrade aims for better hardware compatibility and performance. For very important information, please check out this link:
Coreboot Firmware for Asus Chromebox
As I had already completed the processes as described further below, booting into Linux Mint, I was able to download the flash program from this forum:
To backup the firmware on the device (before flashing), run the following command:
sudo flashrom -r stock_firmware.bin
** You must unlock the firmware write-protect screw before completing this next step, see instructions below **
After downloading the flashrom utility, performing a firmware backup, and then obtaining the coreboot firmware, use the following command to properly flash the rom:
sudo flashrom -w coreboot-panther-xxxxxxx.rom
[1st Update: Added instructions to fix ‘Boot to USB’ thanks to John Lewis. Allows Installation of different Linux versions via USB drive]
ORIGINAL GUIDE W/ VARIOUS OPTIONS
The following are step-by-step instructions to convert the ASUS Chromebox to a full-working Ubuntu Desktop. I have spent the last few weeks researching the web, finding many great resources, and successfully implementing the process outlined below. Much of the information I’ve assembled has been provided thanks to the hard work and efforts by others. Please read through before completing any steps — there are one or two important notes at the bottom.
I think it is important to note that this guide was composed while working in the Ubuntu Desktop on the Chromebox using tools like GIMP and Chrome Browser. The system and applications load very quickly and are responsive. While it is not for playing hard-core games, I think it makes for a great desktop replacement; small, efficient, and versatile. I would also share that I enjoyed my experience with the Chrome OS. The system was fast, easy to navigate, and I could easily accomplish 95% of my various task and projects as a power-user. This is in large part to the increasing trend of cloud-based software and services becoming more of the norm.
To start, you can complete this process without any additional hardware upgrades but, if you want some more resources/overhead to play with, here are some Optional Upgrades:
(1)x2GB or (2)x4GB Laptop DDR3 1.35V
Example from Newegg.Com
(1)x32, 64, or 128GB M.2 SSD Drive
Example from Amazon.com
First Step:Download a Recovery Image (although this can be done from another device at any point. It is good to have on-hand regardless)
https://support.google.com/chromebook/answer/1080595?hl=en
or
Direct Link to Recovery Image
Second Step: Put the device into Developer Mode
- Turn off the Chromebox.
- Find the tiny hole near the Kensington lock slot.
- Stick a paperclip in that slot and press down until you feel a button click.
- Hold the paperclip down while pressing the power button to turn on the device.
- When the device boots into the scary white screen, press Ctrl + D on your keyboard and then follow the on-screen directions.
Step Three: Patch/Update Seabios to allow Boot to USB (Update 4/20/14: This patch has been included in the newest version of the Chrubuntu script — so technically, this step can be skipped.)
Many thanks to John Lewis for providing these instructions: http://johnlewis.ie/asus-chromebox-owners-rejoice/
Step Four: Setup/Install Chrubuntu, Crouton, Both, or something completely different.
After playing around with a few methods, I chose to run Chrubuntu thus allowing Ubuntu to run on a cleaner install of sorts while being able to utilize all available resources. I still have access to Chrome OS if so desired. It is very easy to play around with Ubuntu, screw it up, and re-install using the Chrubuntu script (although it is not hard to do this as well with the Crouton method.)
With the new Bios fix above, one now has the option to do a ‘very clean’ install directly from a USB disk of any Linux distribution desired. Caution should be used during the install process as the Chrome OS partition could potentially be wiped (not that it can’t be restored and it may not be wanted.) It should be noted that the Chrubuntu script provides opportunity for a clean install via the USB disk after it pre-sets your drive partitioning allowing for dual-booting between Linux and Chrome OS. It also provides a set kernel w/ patches to allow the hardware to work properly (although this might not be an issue if you utilize a new kernel 3.14.x)
The following are links to each method:
Chrubuntu: http://chromeos-cr48.blogspot.com/2013/10/chrubuntu-for-new-chromebooks-now-with.html
Crouton: https://github.com/dnschneid/crouton
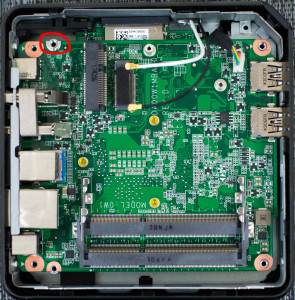
Step 5: Modify Default Boot Settings
- remove the firmware write protect screw (upper-left corner in picture below, circled in red. Screw bridges gap between two half-circle silver connectors)
- Enable Developer Mode Bios ** (This might be optional. I had seen it referenced on various sites but it was not referenced in some of the more recent guides. To err on the safe side, I completed this step and the process worked):
- If you want to make modifications to the Chrome OS filesystem or boot your own version of Chromium OS, you’ll need to activate the second level of developer access. You do this by running a special command from the command line shell. You first log in with the username ‘chronos’ (if you’ve set a shell password, you’ll be prompted for it). Then you switch to the ‘root’ account, and run the command to install the developer-mode BIOS. For example:
localhost login: chronos
chronos@localhost $ sudo bash
localhost chronos # chromeos-firmwareupdate –mode=todev
- If you want to make modifications to the Chrome OS filesystem or boot your own version of Chromium OS, you’ll need to activate the second level of developer access. You do this by running a special command from the command line shell. You first log in with the username ‘chronos’ (if you’ve set a shell password, you’ll be prompted for it). Then you switch to the ‘root’ account, and run the command to install the developer-mode BIOS. For example:
- from the ChromeOS terminal:
- shell
sudo-s
flashrom –wp-disable
set_gbb_flags.sh 0×489
- shell

- About Set Flags: In Chrome OS there is a script called set_gbb_flags.sh that will do this for you. Run the script with no arguments to get a list of possible flags and then to enable short dev mode screen (1 second timeout) followed by default legacy mode boot you could use these flags:GBB_FLAG_DEV_SCREEN_SHORT_DELAY 0×00000001
GBB_FLAG_FORCE_DEV_SWITCH_ON 0×00000008
GBB_FLAG_FORCE_DEV_BOOT_LEGACY 0×00000080
GBB_FLAG_DEFAULT_DEV_BOOT_LEGACY 0×00000400set_gbb_flags.sh 0×489 - Information on the flags/scripts was found at: http://johnlewis.ie/how-to-make-seabios-the-default-on-your-acer-c720
Conclusion: At this point, one should have a Asus Chromebox that Boots to an Ubuntu install and, one has the option during boot to still load ChromeOS by hitting <ctrl>+<D>
For some additional resources & notes:
- There is currently a known-bug in the SEABIOS that prevents boot to USB. While this is mentioned as a possibility in the guides above, it will not work. This prevents us from installing/loading alternate versions of Linux like LinuxMint. More information:
https://code.google.com/p/chromium/issues/detail?id=350598
- As notated above, John Lewis has provided a fix for the SeaBios bug: http://johnlewis.ie/asus-chromebox-owners-rejoice/
- Other websites: